In San Antonio, and farther south, the influence of the traditional celebration of Dia de los Muertos is so prevalent that it’s popularity even has Target carrying decorating supplies in-store. If you check your facts on history.com and nationalgeographic.com, you’ll find that this celebration goes back to the Aztec empire in Mexico. The Aztec celebration evolved over time, especially in the 1500s when Spanish conquistadors brought over the Catholic feast days of All Souls and All Saints.
Originally, the holiday celebrated the lives of those who had passed on, and Catholics have uplifted many of the traditions of making death beautiful and applauding life by incorporating them into All Saints and All Souls Day celebrations. Families gather pictures of deceased family and friends, place them on offrendas, and surround them with beautiful things that speak of who they were when they were alive. Revelers often paint their faces into beautiful white skulls adorned with flowers and flourishes. Marigolds, mums, and roses are often placed on graves while family members dance, sing and pray for those they mourn.
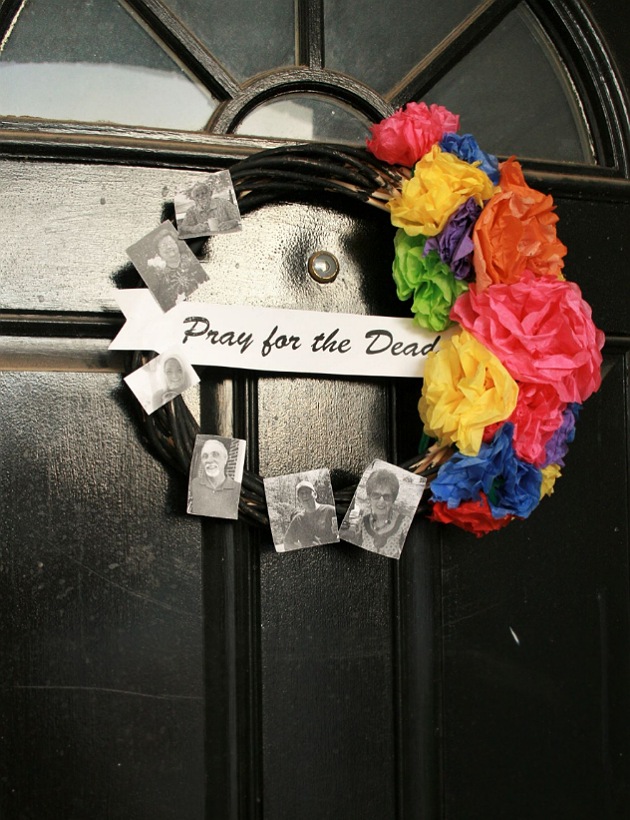
Our wreath won’t take you to a gravesite, but it may take you down memory lane, searching Facebook and long-forgotten file folders for photos of those who may still be waiting in purgatory. It will also take you back to gradeschool as you start making the tissue paper flowers.
 Turns out, it was also a fantastic conversation starter for my older two kids as we hunted down photos of all those we’ve lost in the last three years. Unfortunately, my kids have had to come to terms with lots of loss over those few years. But, thankfully, much of it was my extended family, who we don’t get to see tremendously often, and who they weren’t attached to.
Originally, I had wanted to have the photos on the black part of the wreath, with each touching a stem getting ever greener until it bloomed into the bouquet of flowers. Hence, I meant to symbolize the new life that comes from earthly death. I also thought a transition from the door to the wall with those giant paper flowers that are all over Pinterest would be a great way to show how that life can spread and grow. My ideas, however, are often larger than my time or my budget.
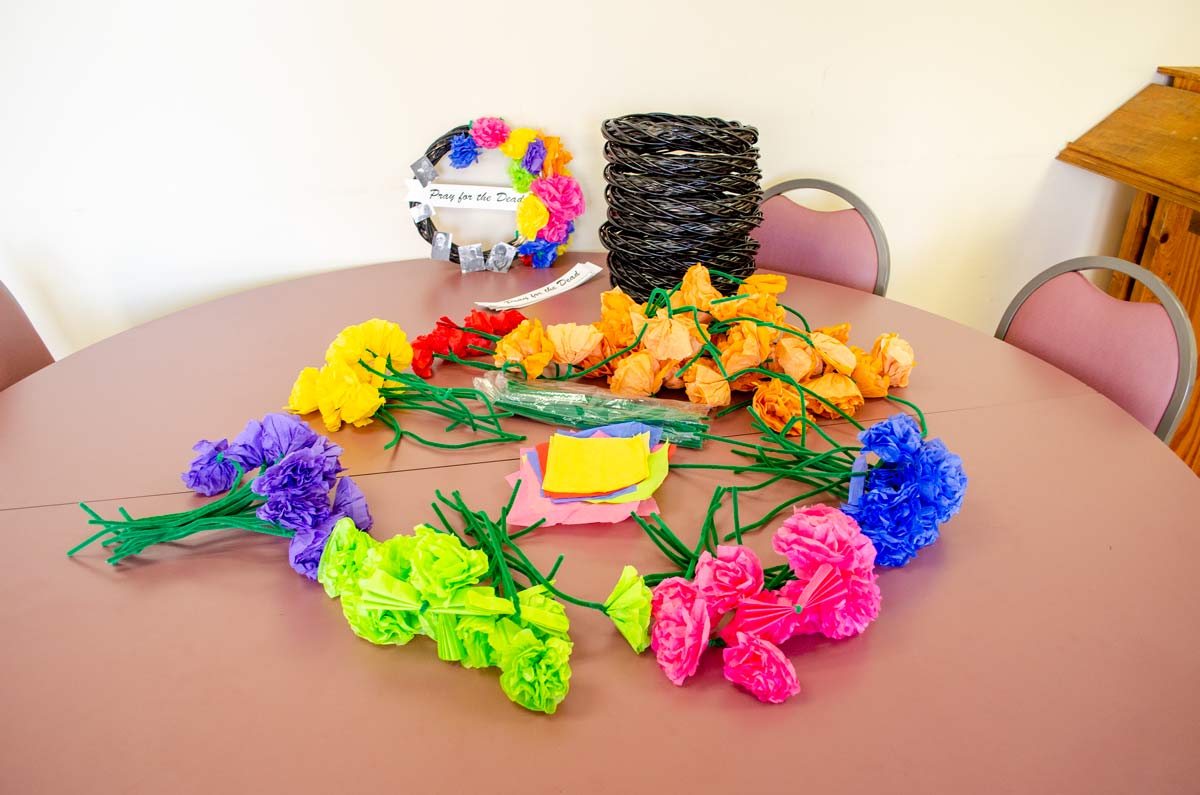
To make the wreath, first swing by your local Dollar Tree. They have different wreaths at different times. These happened to be a pine color, but one of our moms spray painted them black for me. I had tried letting my 2- and 4-year-old paint one with craft paint, but the nooks and crannies left were simply too daunting.
Wreaths in hand, it’s time for the traditional tissue paper flowers that bring to mind Dia de los Muertos, San Antonio’s Fiesta, and the city’s historic downtown marketplace. I prepped 100 flowers for the 10 families I expected at our event. Thank goodness my girls like to accordion fold stacks of paper! I cut the squares in two different sizes, dividing whole sheets of tissue paper into equal squares so nothing was wasted. I stacked them up four squares per flower, and the girls got to work. Once folded, I wrapped a green pipe cleaner around the middle and rounded off the ends with a single curved cut, just to give them a cleaner look. After that, each layer of tissue paper pulled gently and fluffed makes a paper model of the marigolds often placed on graves for the Day of the Dead. I did leave some unfluffed because I noticed how much my littlest ones enjoyed the challenge of separating and pulling gently, and I thought it might offer the kids in our group some good fine motor skill practice as well.
As my girls paraded around with bouquets of freshly made flowers, pretending to be brides, I printed out pictures of our family and friends who had died. Our color printer is perpetually out of ink, but I figured that black and white would add another depth of symbolism anyway. I copied all of the photos into a blank Word document, cropped and resized them there, then printed them on cardstock. Further grandiose ideas had me yearning to frame each one with mini popsicle sticks. But, my kids have better plans for my time. I cut them apart with regular old scissors, though you could bust out the decorative edge ones to give it a more finished look. If you’re a scrapbooking enthusiast, you could grab some spare, pre-cut photo frames from your pile, or make some special on a Cricut.
When we did this with our moms group, I made an example wreath by simply gluing them on with tacky glue, and wrapping flowers around one side. I gave them a homework assignment after the fact of finding photos of their deceased loved ones. Plus, some of our kids opted to put our paper, “souls” on them instead. For a final touch, I hoped back on Word, changed the page orientation to landscape, and typed the words, “pray for the dead.” I free-hand cut the ribbon shape once it was printed. If you want to get fancy with it, you could use real ribbon and iron-on letters, either store-bought, or custom cut on your cutting machine. The card stock was just long enough to stretch across the wreath’s opening and hang over the edge. The blunt end of the “ribbon” was hidden under the flowers. This again was glued on with tacky glue.
The example ready, I packed up all the supplies the kids would need to make their own. That included all the wreaths, all the pre-made flowers and few spare pipe cleaners and tissue paper pieces, the paper ribbons, my trusty bottle of tacky glue, those useless-for-drinking tiny disposable cups and a Dollar Tree pack of cheap paint brushes for putting the glue on. The kids really had a blast wrapping the flowers around the wreaths, and amazingly, the siblings who had to share didn’t fight!
All of my kids were really excited to hang our wreath on the door and put our Saint pumpkins on our porch. Actually, 2 years ago, my kids, even up to the then 8-year-old, were so excited about the party, they made me recreate the Saint Walk, halo toss, and Saint matching game at home because they had been at school and missed it! This year, looks like we’ll all be making it happen at home!
Dia de los Muertos-Inspired Wreath Craft for Kids
Materials
- 1-12” wreath from Dollar Tree
- 1 can black spray paint
- 4 sheets multicolor tissue paper
- 10 green pipe cleaners
- 2 sheets white card stock
- 5+ scrapbooking mini paper picture frames (optional)
Tools
- Scissors
- Printer
- Tacky glue
- Helpers, aged 4+
Instructions
- Spray paint the wreath with black spray paint. Allow to dry.
- Meanwhile, find, resize, and print photos of deceased family and friends from recent years on one sheet of white card stock.
- Type the words, “pray for the dead,” and print in landscape on the second sheet of card stock.
- Cut apart the printed photos, and cut a ribbon shape around, “pray for the dead”.
- Using tacky glue, secure ribbon shape right across the middle of the wreath, leaving as much of the ribbon end hanging as possible.
- Tacky glue the pictures in place along one side of the wreath. Optional: add scrapbook photo frames or similar for a more finished look.
- Fold 2 sheets of different colored tissue paper in half, and in half again. Cut folded section into four equal squares.
- Fold the remaining 2 sheets of different colored tissue paper into thirds. Cut along the fold lines. Stack rectangles on top of each other, and cut the stack into three equal squares.
- Put same size tissue paper squares in stacks of 4. Accordion fold each stack, going back and forth at every 1/4 inch or so.
- Wrap a green pipe cleaner around the middle of each folded stack and twist to tighten.
- Make a half-circle cut on each end of every folded stack.
- Spread, separate, and fluff each layer.
- Wrap the pipe cleaner stem around the empty side of the wreath, covering the blunt end of the card stock ribbon.
- Hang your completed wreath on your front door for trick-or-treaters to admire, and, hopefully, ask about.


