Years and years ago, when I ran a moms group that focused on doing Mass prep with our 0-5 year-olds, it struck me how many times fish came up in the Sunday readings. Obviously, there’s the miracle of the loaves and fishes. There’s the fishers of men story, too. But, did you remember Jesus asking for food after appearing to the disciples? Do you remember the one where he’s waiting on the shore, cooking fish, and one of the Apostles jumps out of the boat and swims ashore?
Back then, I often relied on some great printable fish from CraftingtheWordofGod.com. This summer, though, my girls came home from art camp with a paper fish we decided would be perfect for Bible crafts. I sat down and made a Paper fish PDF with all the parts of the fish so that it all only takes one sheet of paper, scissors, and a glue stick.

How to Make a Paper Fish
This project takes folding, cutting, and gluing. Everything on the PDF that’s a dashed line is a cut line. The solid lines are either fold or just details. Each shape or line has a number by it so you can do the steps in order. If you’re offering this to kids 5 and under, I recommend cutting out the pieces for them, and letting them follow the assembly instructions. 
Step 1:
Cut across line F. Set aside the detail pieces and work with the bigger square piece that is the fish’s body for the next step.

Step 2:
Fold line A.

Step 3:
With your paper still folded, make all the cut lines on the body of the fish on the dashed lines, the start of which is labeled “D”.

Step 4:
Fold lines B & C.

Step 4:
Glue the flaps you just folded so that they overlap one another.
Step 5:
Cut out the detail pieces from the part of the printout you cut off in Step 1.

Step 6:
Glue on the heart shaped piece as a tale at the small, pointed end of your fish. Attach the half-heart pieces as fins to the side of your fish near the first cut line on the fish body. Insert your hand or something skinny that you can use to apply presure into the body of the fish if the glue isn’t securing the fins and tail.


Step 7:
Glue on the half-circle as a bottom jaw for the fish. This goes across the two flaps you glued together in Step 4.

Step 8:
Glue the eyes right on top of the placement circles at the nose of the fish. You can also omit the extra eyes and either draw on X’s or draw on the eyes over the placement circles. Or, you can use regular liquid glue and add googly eyes instead.

Step 9:
Duplicate! Make as many as you need to relate the Bible story you’re studying that references fish. Don’t forget the plate!


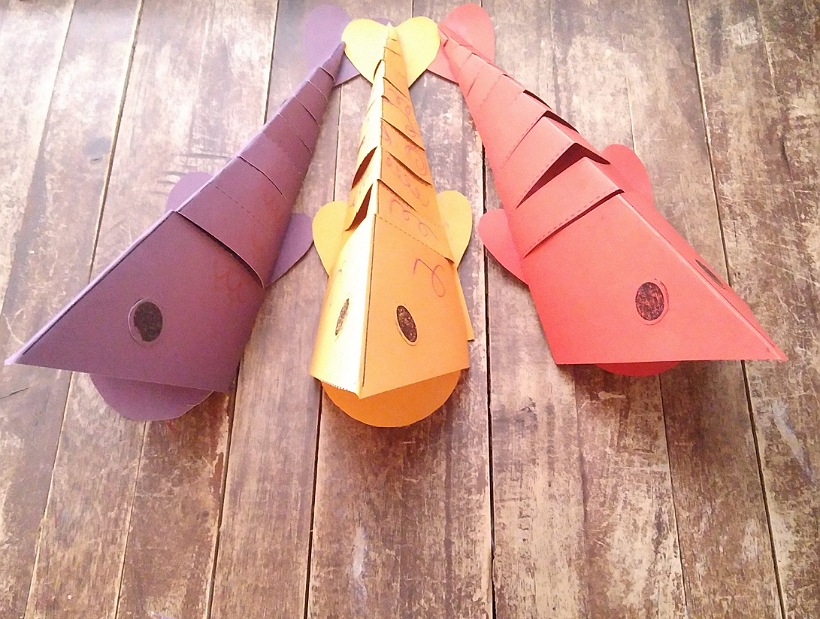
How to Make a Paper Fish
Paper fish for all your Bible story needs!
Materials
- printer paper or cardstock in your choice of color
- glue stick
Tools
- scissors
- printer
Instructions
- After printing the Paper Fish PDF, cut across line F. Set aside the detail pieces and work with the bigger square piece that is the fish’s body for the next step.
- Fold line A
- With your paper still folded, make all the cut lines on the body of the fish on the dashed lines, the start of which is labeled “D”.
- Fold lines B & C.
- Glue the flaps you just folded so that they overlap one another.
- Cut out the detail pieces from the part of the printout you cut off in Step 1.
- Glue on the heart shaped piece as a tale at the small, pointed end of your fish. Attach the half-heart pieces as fins to the side of your fish near the first cut line on the fish body. Insert your hand or something skinny that you can use to apply presure into the body of the fish if the glue isn’t securing the fins and tail.
- Glue on the half-circle as a bottom jaw for the fish. This goes across the two flaps you glued together in Step 4.
- Duplicate! Make as many as you need to relate the Bible story you’re studying that references fish. Don’t forget the plate!