All Saints Day Crafts
To come up with the idea for St. Helen as a pumpkin for our annual All Souls/All Saints Day Party, I just had to look around my neck. With the birth of each of our children came the gift of a Saint pendant from my husband that corresponded to the new baby’s name. Plus, that particular daughter requested it! If you haven’t run across our other Saintly gourds, you can find a handful from last year, including St. John the Baptist, and St. Faustina.

Over the years, we’ve made about two dozen different Saint pumpkins. The first year, we used mandarin oranges because the tiny, floral department pumpkins were nowhere to be found. Check back in October, and you might just find that we’ve had time to upload pictures of the St. Anne pumpkin we’re planning for this year. It will have the 4″ pumpkin like all of our others, and, as a reference to that first year, a little mandarin orange Mary pumpkin in it’s pipe cleaner arms.
Who Was St. Helen?
The first important note about St. Helen is that she is more often known as St. Helena and St. Helena of the Cross. She lived during the third and fourth centuries, and was mother to Emperor Constantine. Though St. Helena’s husband betrayed her, leaving her for another wife to gain greater political status, her son Constantine stayed by her side. Her son’s influence helped bring her to Christianity. With great power and wealth at her side, St. Helen began building churches as she searched for relics. Those churches include the Church of the Nativity, where, as you might guess, it is believed Christ was born; and the Church of Eleona on the Mount of Olives where the Ascension took place.
 In her searches, St. Helena unearthed three crosses that had been buried beneath a pagan temple she had had destroyed. Tradition has it that a dying woman laid a hand on each cross. While the first two made no difference, on the last, that one touch cured her. With such evidence, St. Helen declared it the True Cross. She also found the three nails, pieces of Jesus’ tunic, and parts of the rope that tied him to the cross. They can still be seen in the Basillica of the Holy Cross in Jerusalem today.
Besides her help in locating such important relics, St. Helena also offered generous donations to entire churches and communities, and her influence helped to spread Christianity.
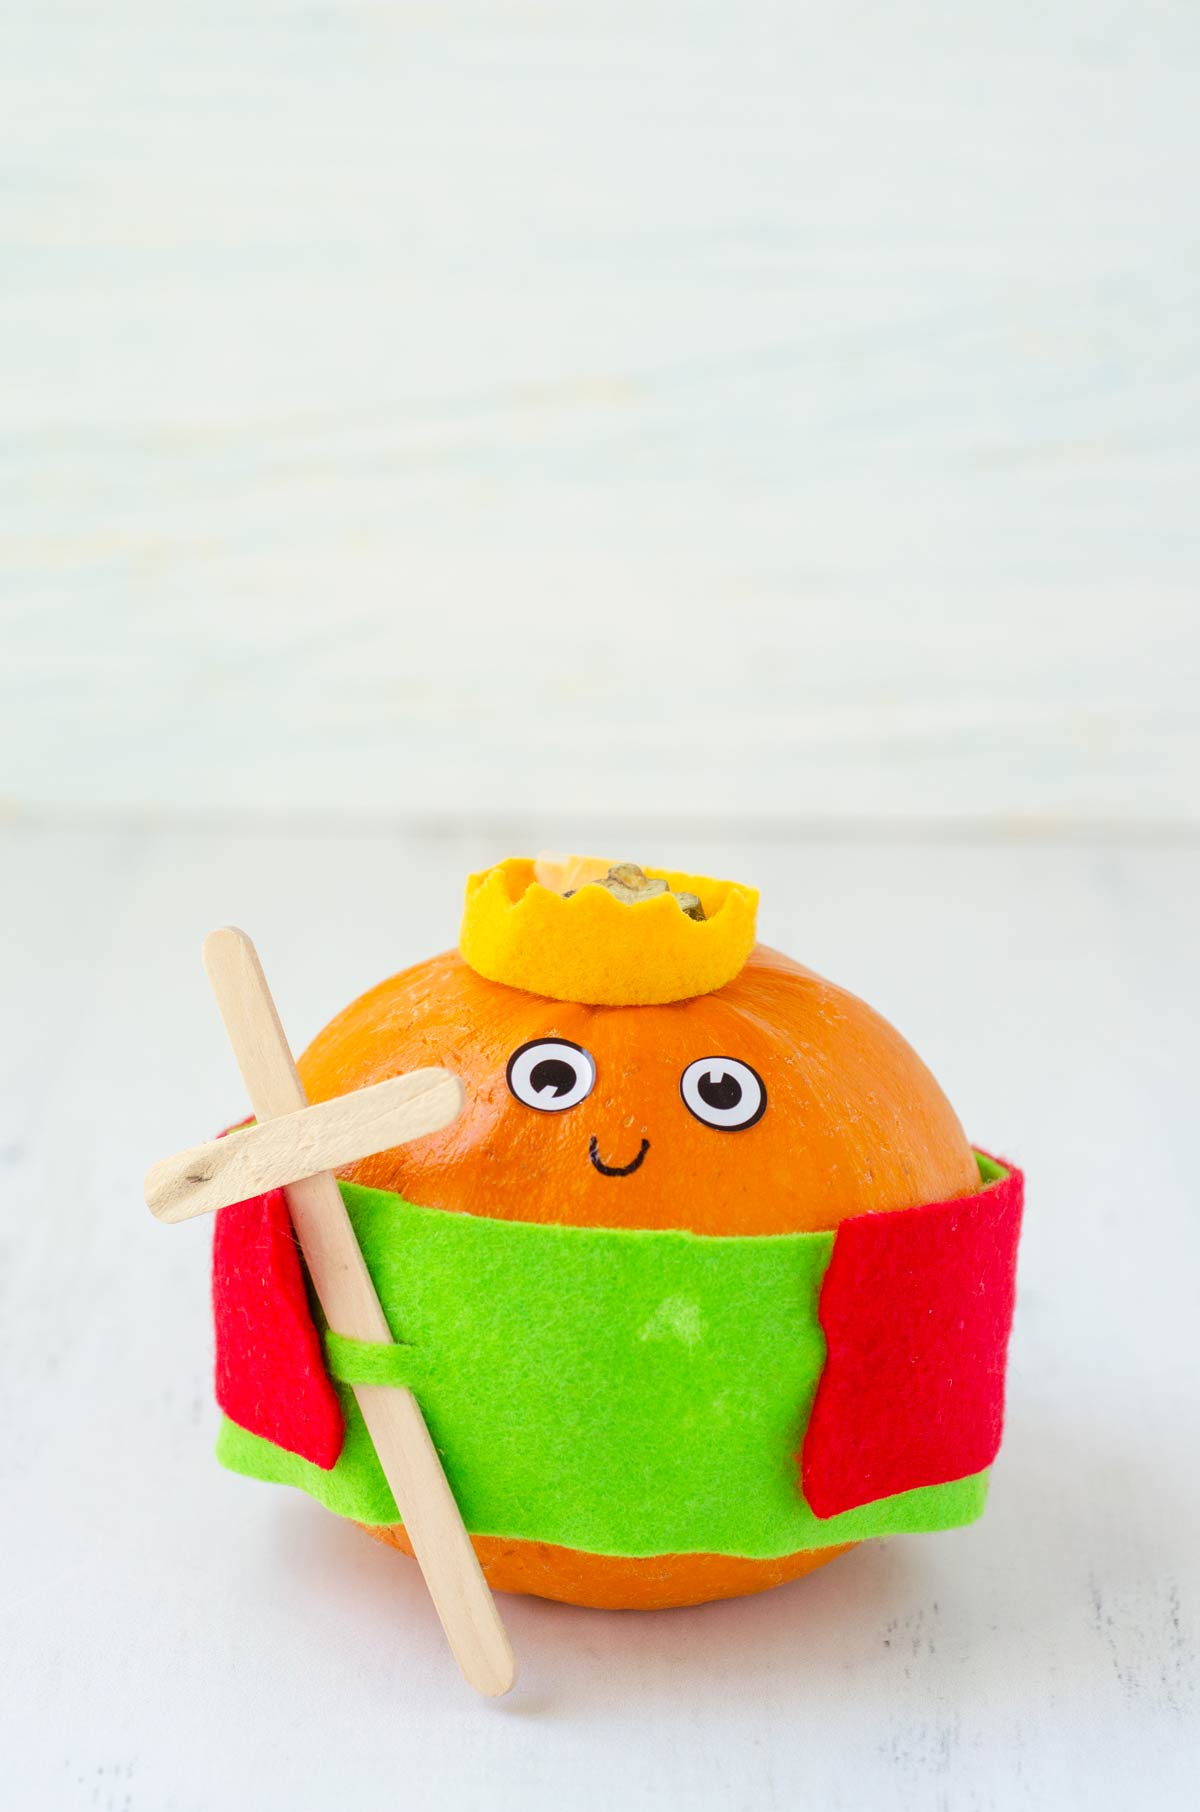
All Saints Day Crafts: St. Helen Pumpkin
Materials
- 4 - 4” pumpkins
- 1 - Red 9 x 12 felt sheet
- 1 - White 9 x 12 felt sheet
- 2 - green 9 x 12 felt sheets (sticky-back preferred)
- Scrap yellow or goldenrod felt
- 8 -Sticky googly or sticker eyes
- 4 - mini popsicle sticks
- 4 - popsicle sticks
Tools
- Tacky glue
- Sharpie Marker
- Tape
Instructions
Preparing St. Helen’s dress, cape, coif, and crown:
- Cut a piece of green felt (sticky-back preferred) lengthwise into 5 strips. This is her dress.
- Cut a piece of red felt lengthwise into 6 strips. Fold each strip in half and cut a wavy line about a half inch from the fold, creating two separate pieces. Line up the straight edge of the red felt with either end of the green you cut in step 1. This creates her cape.
- Once the glue dries, fold the dress and cape in two, just to the left of the middle. Cut two small parallel lines, about ¼ inch apart. This will create a little pocket to slip in the popsicle stick cross you’re making next.
- Take one regular popsicle stick and one mini popsicle stick and glue them together with tacky glue to create a cross. When dry, slip the bottom of the cross through both slits you made in step 3.
- For the coif, using ¼ of a piece of white or ivory felt, make a large oval. In the center of the oval, cut perpendicular slits (see St. Peter for detailed instructions on these cuts). Fold in half again and cut a large circle to reveal the entire face.
- With a small piece of yellow felt, cut a 1” x 3.5” strip. Fold it in half and cut little valleys and pointed peaks to create the crown. Secure in a circle with tacky glue or tape.
- Place all items in a labeled zip top bag, including sticky or googly eyes.
Instructing the kids:
- Remove all items from the bag. (Bags can be labeled with a Saint card or printed image, especially for non-readers)
- If using tacky glue instead of sticky back felt or eyes, put it in small plastic or Dixie cups with paint brushes. Don’t forget the paper towels! And baby wipes!
- Help the kids take the backing off of the clothes and wrap around the bottom of the pumpkin. Or, cover the clothes with glue and put around the bottom of the pumpkin. The clothes can also be secured at the back with a return address or shipping label, printed with the Saint name, information about the Saint, or a corresponding prayer.
- Let the kids place any hair or head covering over the stem through the perpendicular slits. Optional: secure with more tacky glue.
- Show the kids where to place the cross and allow them to push it through the felt slits of the dress..
- Draw on a mouth with a Sharpie marker wherever the child shows you to.
- Enjoy your Saint pumpkin and put it outside your door for trick-or-treaters to admire!
- Take lots of pictures and link them back to this post!